Sep 24, 2012

Tutorial made ​​cross stitch pattern using Wilcom


You probably would not think that making a cross stitch pattern by using Wilcom is easy maybe even just a few seconds.


Step One

First run your program Wilcom and select the Insert menu - Cross Stitch


Step Two 


Select a picture or design that you create cross stitch


Step Three

Use the Auto Stitch Image to change the picture or design into cross stitch (red circle)


Finish


Hope can be an inspiration


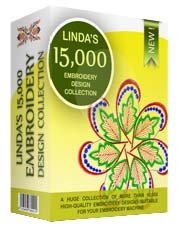
Have you had enough of browsing through non-professional, amateurish and cheap embroidery design collections? This is the solution to the problem. Are you tired of searching the internet for embroidery designs on every web-page possible, just to discover that you have to pay a fee for every item you buy? Not to mention the time-consuming process required of searching thousands of sites to find your designs? Let us give you a simple but most efficient solution to this problem

Read more »

Sep 22, 2012

Embroidery Iphone 5 logo


Already buy iphone 5 yet?

5th generation smartphone was recently released on September 21 iphone more remarkable today is the fifth in the order of 2 million units in 24 hours
there are even some people who are willing to stay at the front of the store to get the iphone 5 directly. INCREDIBLE!

Therefore, this tutorial will create a logo iphone 5 may be an inspiration


Step One

First I will make the leaves by using the tools INPUT A


Step Two


Then I make the apple fruit by using the tools Complex Fill

Tip: for a curved line use the right mouse button


Step Three


Now proceed to the text iphone 5, This section also I use tolls INPUT A
for the letters H and N Execute the front first so that the results be good


Finish


Perfect for club shirt users iphone 5, hopefully be an inspiration


Read more »

Sep 21, 2012

Saung Angklung Udjo Embroidery


Do you know Angklung?

The Angklung is a musical instrument made ​​of two bamboo tubes attached to a bamboo frame. The tubes are carved to have a resonant pitch when struck and are tuned to octaves. The base of the frame is held in one hand, whilst the other hand strucks the instrument. This causes a repeating note to sound. Each of three or more performers in an ensemble angkalung play just one note or more, but altogether complete melodies are produced. The Angklung is popular throughout Southeast Asia, but it originated in today's Indonesia and has been played by the Sundanese for many centuries. (wiki)

talking about angklung can not be separated from a Udjo Ngalagena Born in March 5th, 1929 from the couple Wiranta and Imi, Little Udjo started his journey in music, art and culture, since he was 4 years old

His talent kept growing and he Became an art teacher in several schools in Bandung. To improve his knowledge and abilities, Udjo did not hesitate to learn directly from the experts, such as: Mang Koko the Kacapi expert; Rd.Machyar Anga Kusumahdinata the gamelan teachers, and Daeng Soetigna the re-inventor of Angklung diatonic. Soon he Became the assistant of Daeng Soetigna, and led performances on Behalf of the teache.
You can find out more at SAUNG ANGKLUNG UDJO


Step One


Now is the time to make embroidery angklung. Insert images using the Image menu> insert drawing files ..

Step Two


The first change variables Triple Run:

Right-click the Run icon or Triple Run.
The Object Properties> Outline Stitch tab opens.

Select the Variable Run Length checkbox.
In the Minimum Stitch Length field, enter the minimum stitch length to allow.
In the Chord Gap field, enter the maximum distance to allow between the digitized outline and the stitches. When this value is exceeded the stitch length is reduced to more closely follow the outline.


The result will be as shown below


For the greater part of the bamboo I used the tool Input A and Comflex Fill


Once completed, I reduce the size of embroidery to 11%


Finish


You can combine embroidery and printing


Have you had enough of browsing through non-professional, amateurish and cheap embroidery design collections? This is the solution to the problem. Are you tired of searching the internet for embroidery designs on every web-page possible, just to discover that you have to pay a fee for every item you buy? Not to mention the time-consuming process required of searching thousands of sites to find your designs? Let us give you a simple but most efficient solution to this problem


Read more »

Sep 20, 2012

How create applications with Wilcom


Only this time I could write another article about Wilcom embroidery software tutorial Because yesterday I have a little extra work :)
OK .. at this tutorial I will be sharing how to make an application carrots Good applied to the caps, bibs, sweater, etc.
how to make it not too difficult, you just get used to using the tool..

I hope this article inspires you :)


Step 1- Inset Image


First import images from your computer directory, select the Image menu - Insert Drawing File and select the file,Do not forget to lock the image in order to remain in position.

To lock or unlock objects
Select the object / s to lock and select Arrange> Lock.
The selection handles disappear, Indicating That the object can no longer be selected or modified.
To unlock objects select Arrange> Unlock.
All locked objects in the design are unlocked

Or you can use the shortcut
K to lock and Shift + K to open the lock


Step 2 - Drawing Pattern


In this design there are two applications, the leaves and carrot so I had to make two basic patterns.

After being completely locked time you make a basic pattern of the application by using the RUN tool or Shift + N (Red Circle) do the best possible
will cause your accuracy will affect the final result.

you do the same with the carrots on the side


Step 3 -Duplicate Pattern


After completing the basic pattern in both the leaves of carrots do the same thing on the carrots.
then choose the pattern one by one and followed with a tool backtrack (red circle) to copy the pattern into two parts.
then select the menu Color / Object List and change the color of all parts of the pattern (See Picture Above)

* Why should distinguish color patterns? and why there should be two?
  I'll explain later at the end of the article
*Color / Object List: Drag and drop to sort


Step 4 - Use Input A Tool


After you are done with the pattern it is time to cover the outside of the pattern with a satin stich use tool Input A (red circle)
Will be a little difficult for beginners but if you are already accustomed to it will be very easy :)
Do it on all the edges and in the pattern then the result will be like the picture below


How to Use Input A

Input A
For tutorial how to use the input A clik the link Above


Step 5 - Finish


When finished be sure to tie off, what is the tie off?

With jumps, the stitch needs to be tied off so the thread can be trimmed without the stitches unraveling. You can select Between two automatic tie-off methods:

The first inserts the tie-off stitches along the last stitch. This is Suitable for large shapes filled with Tatami.
The second inserts the tie-off stitches Between the last two stitches. This prevents stitches from bulging at the edge of shapes. This is Suitable for Satin stitch columns and Lettering objects.

For narrow shapes or columns: e.g. small lettering: use only one tie-off stitch. You may also Decrease the stitch length.
To adjust the tie-off settings
Click the Properties icon.
The Object Properties dialog opens.

Select the Object Properties> Connectors tab.

Off After Tie in the Object panel, select a tie-off option.
Off: no tie-offs are inserted. By selecting this option, you can add a tie-off functions manually. See Adding tie-offs for details.
Always Tie Off: tie-offs are inserted after the object.
If Tie Off: tie-offs are created if Certain conditions are met. When you select this option, the condition Become checkboxes available.
If you selected Off Tie If, set the conditions.
Before Trim / Color Change: tie-offs are inserted before trims and color changes.
Next Connector Longer Than: tie-offs are inserted if the next connector exceeds the length you specify.
Click Values.
Tie Off The Values %u200B%u200Bdialog opens.

Set the tie-off values.
Stitch length: Determines length of the tie-off stitches.
Number of stitches: Determines number of tie-off stitches to generate.
Click OK.

*Object Properties : Click the Object Right Clik then tab to Connectors menu


----------------------------------------------------------------------------------------------------------------------------------
Have you had enough of browsing through non-professional, amateurish and cheap embroidery design collections? This is the solution to the problem. Are you tired of searching the internet for embroidery designs on every web-page possible, just to discover that you have to pay a fee for every item you buy? Not to mention the time-consuming process required of searching thousands of sites to find your designs? Let us give you a simple but most efficient solution to this problem


Read more »

Sep 19, 2012

Embroidery Tom Tailor Logo


In this opportunity I will be sharing about how to make embroidery by using Wilcom embroidery software.

Ok... lets begin to make Tom Tailor Logo, i will make this logo in application technique

Step One
Use the RUN tool (Red Circle) to make the basic patterns

Step Two

Then use select object tool then use Backtrack tool to copy the same patterns

Step Three


Change and make difference the color between first basic pattern and backtrack pattern, use color/object list (red Circle) (this option it's make the mechine embroidery otomatic stop)

Step Four


Select the backtrack pattern (the Square 17) then select Insert menu then select Offset Object


Step Five


On the menu there are two option Offset Object. Offset and Object Type, you only change the Object Type and select Input C press OK


Step Six


Tadaaaaa...

Step Seven


Now let's finish up the inside of the logo (to zoom in press Z and Zoom Out Shift+Z)
Use Input A (red Circle) tools to digitize designs for machine, Start from bottom like picture


Step Eight


Same like Step Seven

Finish


This is only an example, I use the logo because I liked the tom tailor products


----------------------------------------------------------------------------------------------------------------------------------
Have you had enough of browsing through non-professional, amateurish and cheap embroidery design collections? This is the solution to the problem. Are you tired of searching the internet for embroidery designs on every web-page possible, just to discover that you have to pay a fee for every item you buy? Not to mention the time-consuming process required of searching thousands of sites to find your designs?
Let us give you a simple but most efficient solution to this problem


Read more »

Feb 1, 2012

Batik EMB


This design is part of batik repeat, I download from www.desiangratis.com, hopefully you like it

Read more »

Jan 17, 2012

Wayang Antasena APL

DownLoad

About Antasena
 
Antasena is Bimasena child, He was born to a mother named Dewi Urangayu daughter Batara Mintuna.
BIMA left his pregnant wife when he should return to the country Amarta. Antasena born and raised by his mother and grandfather, and when he was grow up he go to amarta kingdom to meet his father, But at that time Bhima and his brothers being kidnapped by the Kaurava ally named King Ganggatrimuka Dasarsamodra  
Antasena find his father and the Pandavas were dead, because it was locked up in prison made ​​of iron and drowned in the sea ,By using Cupu Madusena granting his grandfather, Antasena can turn them back and he also killed Ganggatrimuka. Then Antasena married his cousin Arjuna daughter named Janakawati.

Antasena is son of bima the most powerful he can fly, vanish into the earth and also can dive in the water, Her skin was shielded by scales of shrimp that make it immune from weapons..


From wikipedia


Have you had enough of browsing through non-professional, amateurish and cheap embroidery design collections? This is the solution to the problem. Are you tired of searching the internet for embroidery designs on every web-page possible, just to discover that you have to pay a fee for every item you buy? Not to mention the time-consuming process required of searching thousands of sites to find your designs? Let us give you a simple but most efficient solution to this problem


Read more »